Glen Helen glamping and Swiss chalet restaurant

Glen Helen glamping and Swiss chalet restaurant

My lovely school friend Stuart told me he was starting a glamping site a while ago and I knew it would be great! He very kindly let us stay at one of the pods last night to try it out (no string attached!) but I couldn’t not write a review could I?!

The site is described as ‘nature without the rough’ and that’s exactly what you get.

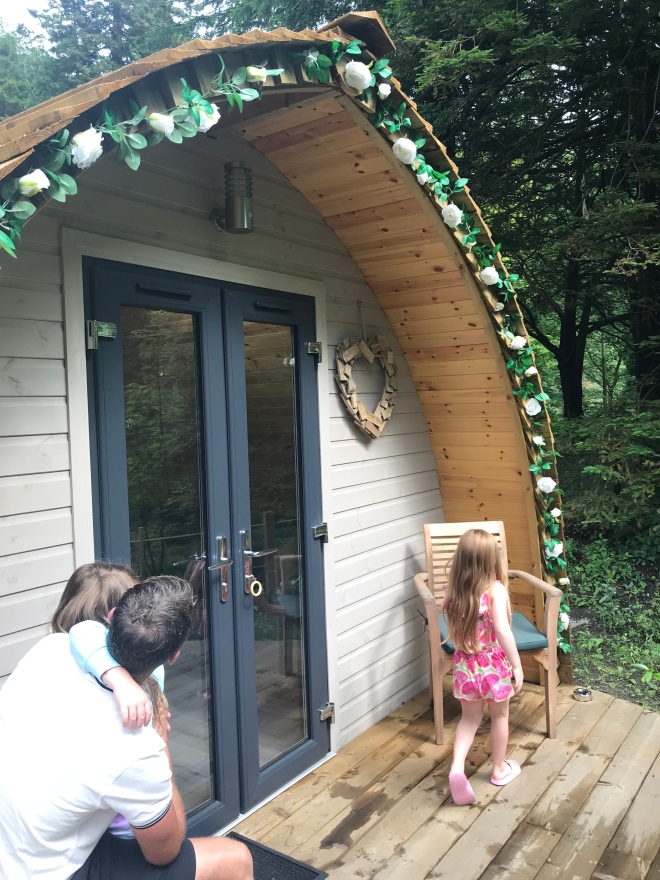
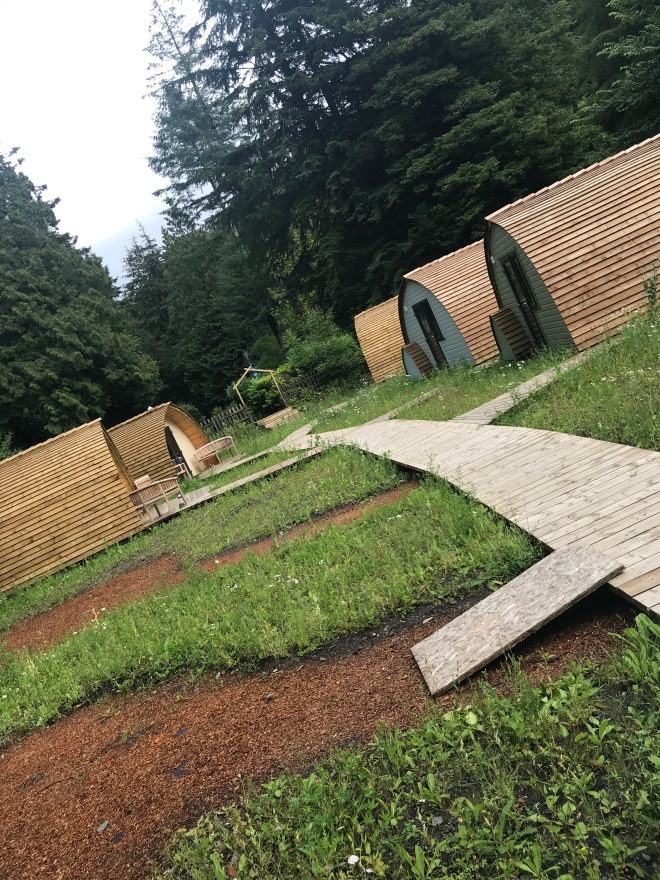
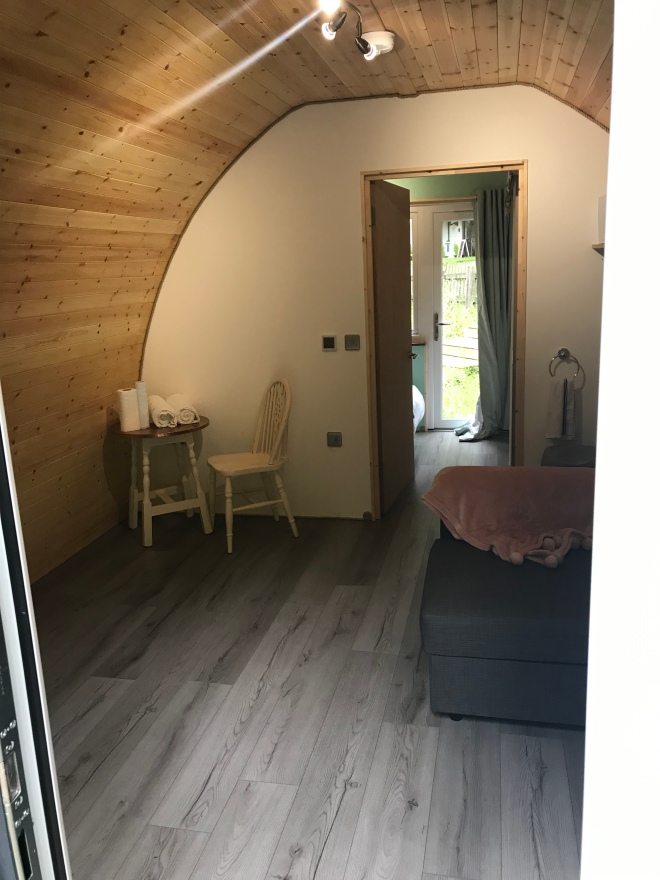
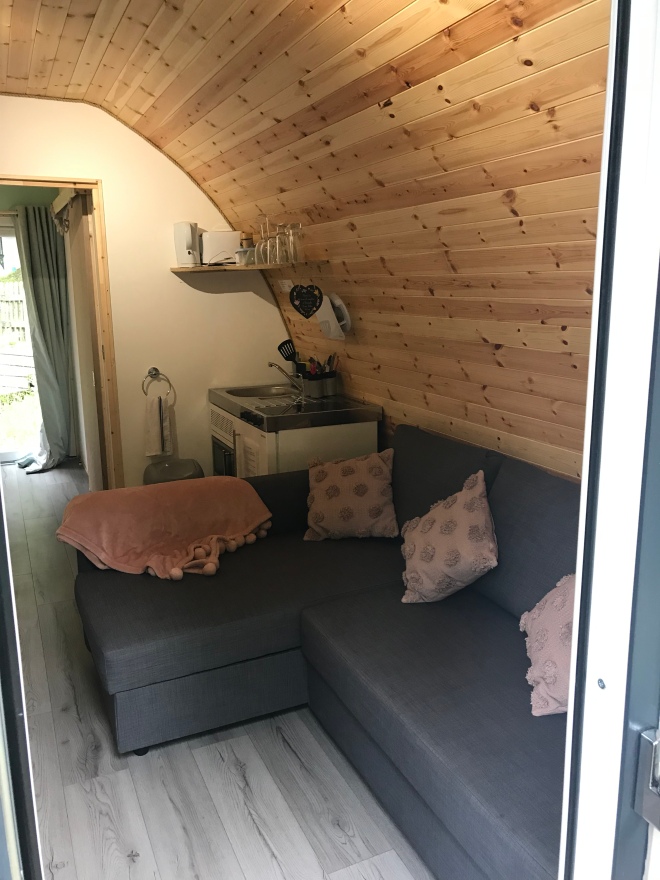
With a power shower, toilet, comfy beds, snuggly duvets, linen and towels provided, underfloor heating and kitchen area inside and outside decking with BBQ / fire pit and seating, this is certainly not your average camping experience! There will be wireless access in the near future but it’s not set up yet so a perfect opportunity to switch off from social media (or use your 4G 😂)

We enjoyed playing board games in the evening with the girls.

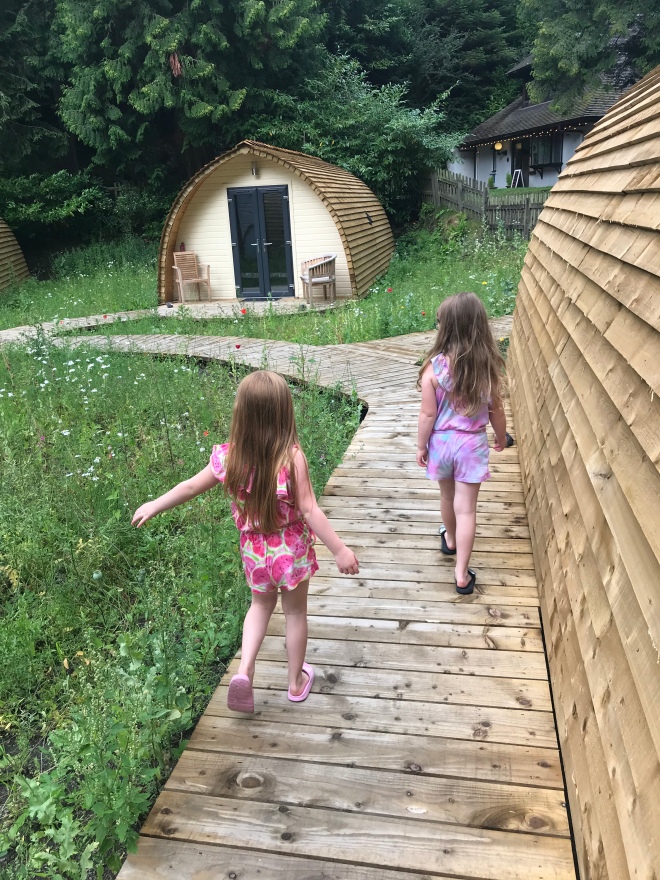
No matter the weather or the season these pods are fit for purpose.

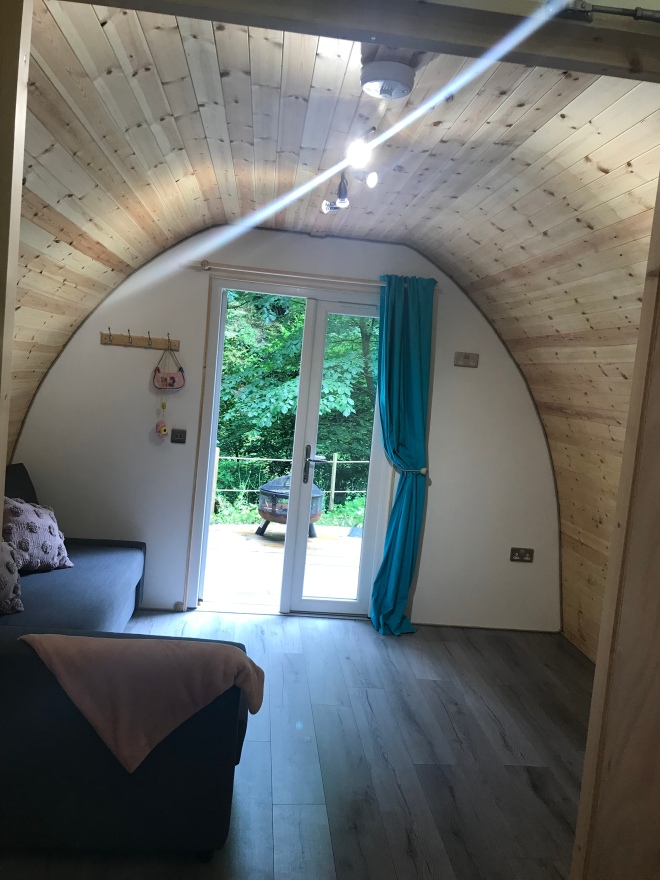
There are 6 pods there currently with a further 2 in the planning. They have loads of plans on how the site is going to evolve but for now it’s looks beautiful with wild flowers growing between the pods to attract butterflies.

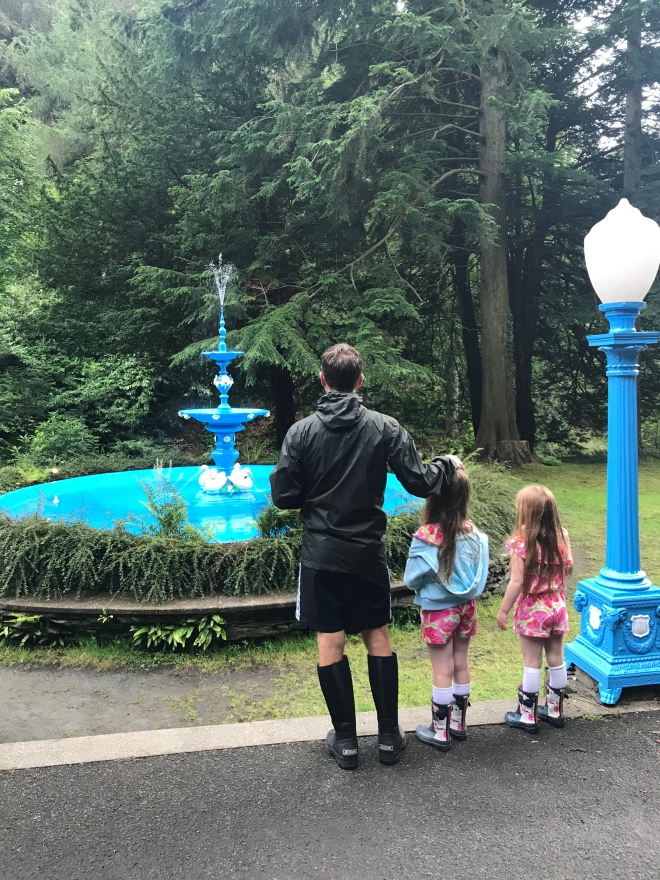
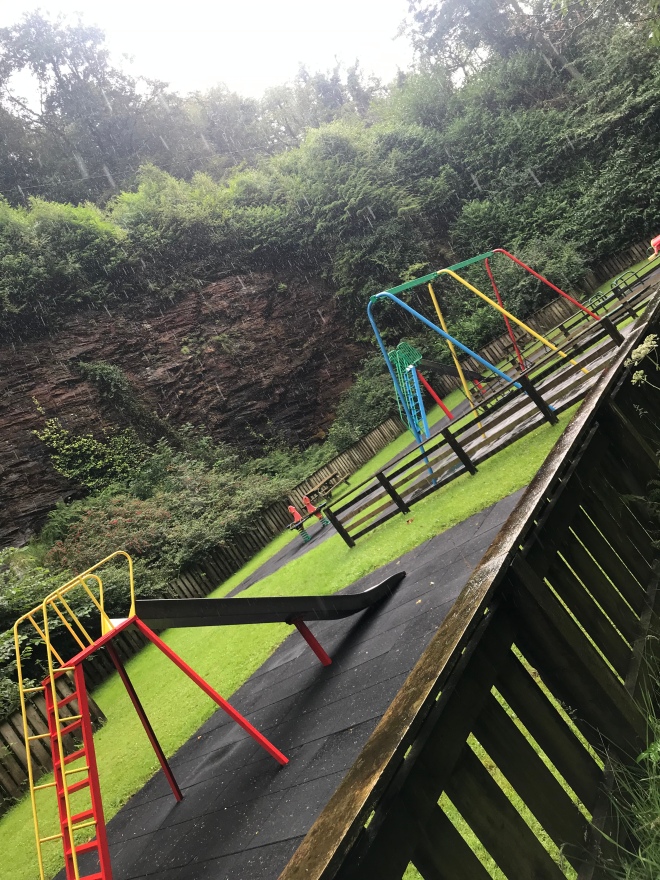
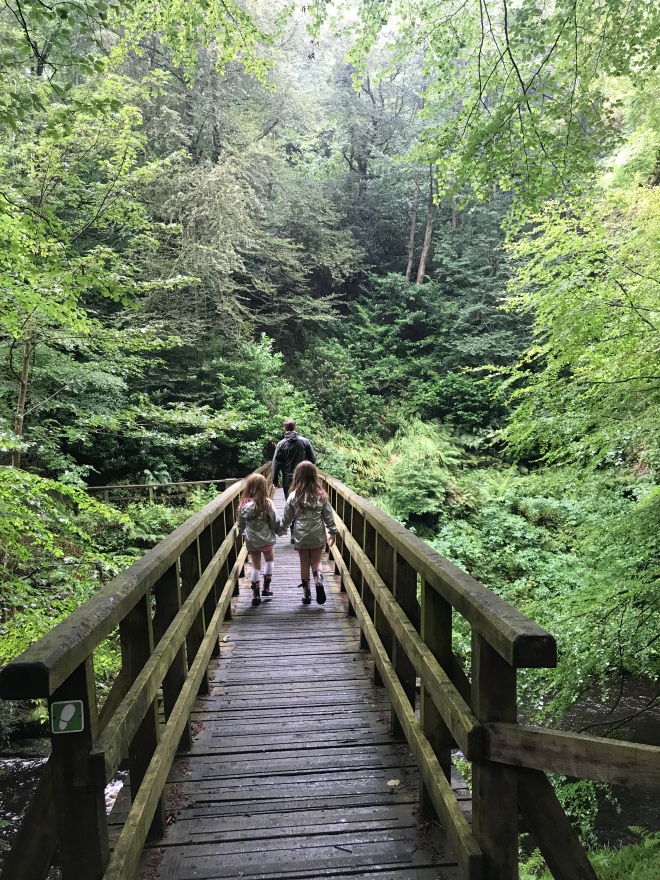
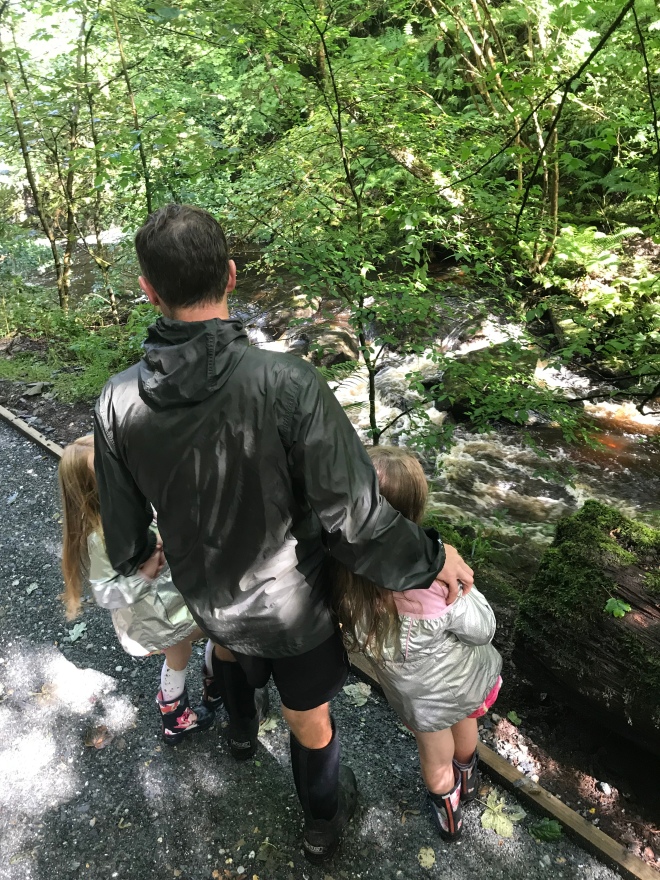
It’s set in the stunning Glen Helen with a great play park for kids and a stunning waterfall at the end of a lovely walk. The DOI are currently resurfacing all the footpaths and have repainted the play equipment. It’s already looking great! The kids will love walking over the big bridge with the river rushing below. They can play ‘Pooh sticks’ or pretend to be a little goat gruff crossing over the trolls bridge 😍

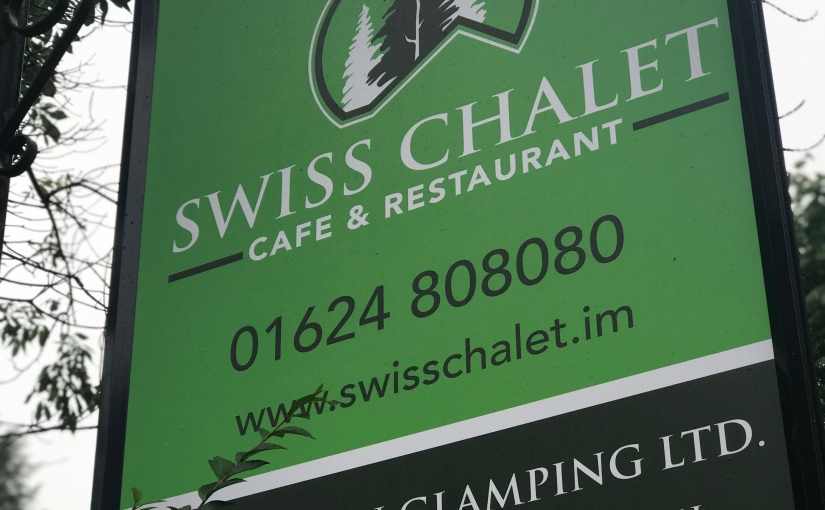
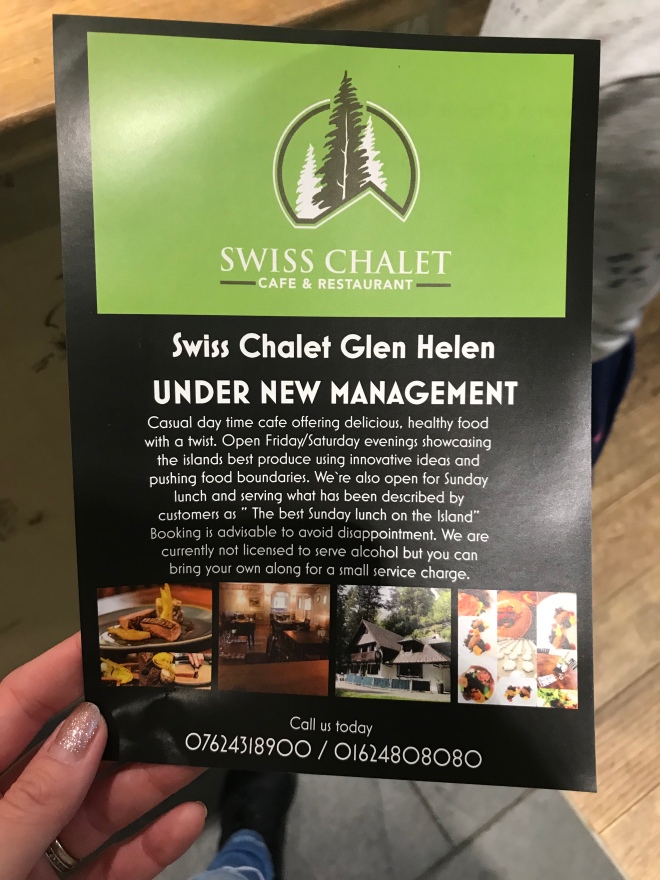
The newly managed Swiss chalet is part of the complex so we tried there for breakfast the following morning too. It was INSANELY GOOD! ( we paid for our own breakfast)

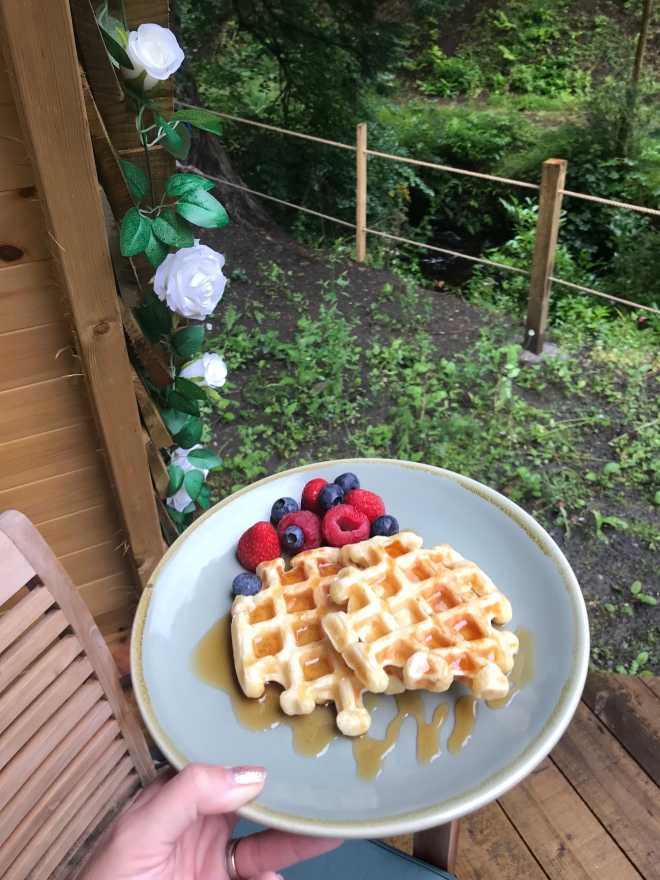
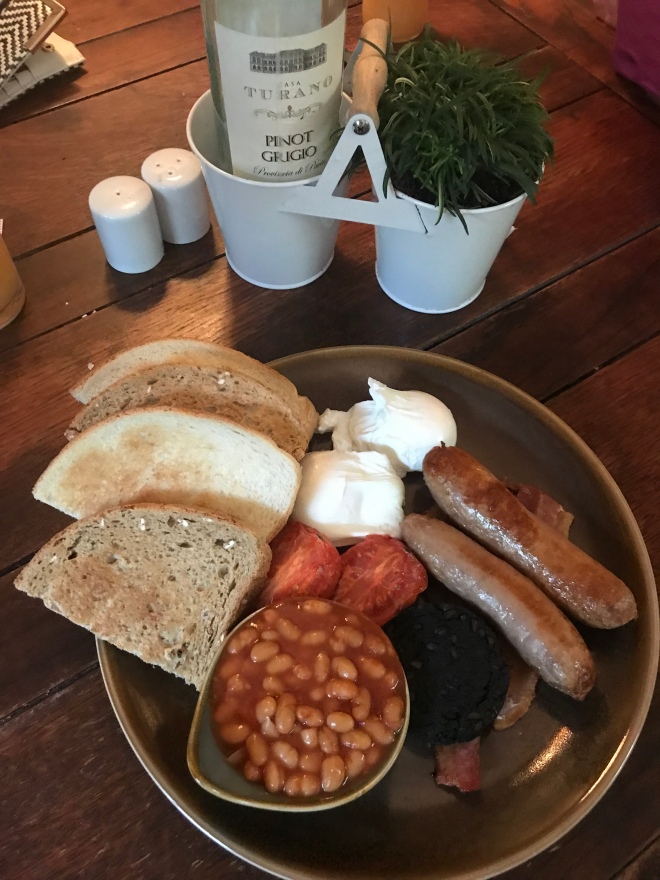
The notoriously picky mr Babytoddlerfoods said the breakfast was the best he’s ever had. And the girls who had said they weren’t hungry because they’d already had waffles and berries in the pod stole all his sausages!

I contacted them a couple of days before I visited to see if there was any chance of a vegan option? WOW! The best vegan meal I have had in a long time! No usual avocado on toast here! The chef whipped me up falafel pancakes with grilled tomatoes, sautéed mushrooms and spinach and fresh rocket with a tomato and chilli jam! I can’t wait to go back!

The restaurant is open in the evenings but we decided to get chips from peel with the kids instead. The lovely @foodieguideiom has visited for evening service and described it as the ‘closest food to Michelin Star on the Isle of Man.’ I know EXACTLY what they mean now and we only had the brunch!! Go and check out their blog post on the restaurant here-

https://thelocalloves.wordpress.com/2019/08/05/new-restaurant-swiss-chalet-glen-helen/

Would I recommend? YES!! it’s certainly not a camping experience, it’s far more luxurious than that. A perfect base for visiting peel or ramsey for days out and if you’re into motorbikes then there’s probably no better place to watch the bikes fly by then the car park.

I would imagine that celebrating a special occasion could not be better done than by a lovely meal at the Swiss chalet and then an overnight stay in the glamping pods.

My friend has attended a hen party staying in the pods with a buffet from the restaurant and she thoroughly enjoyed that.

There’s is also a new event area with stunning views across the glen which would be perfect for a wedding venue 😍

Thank you Stuart and team! We will defo be back! A winter night in the pod would be perfect for snuggling up in 🙌�

Bostick Calendar

Looking for an easy peasy craft to use up the leftover Christmas glitter?

This will give you a lifelong reminder of how small those sticky little fingers were 😍

2018 Calendar

You will need –

• bostik glu

• card

• 2018 mini Calendar

• glitter

•first, stick the Calendar on the bottom middle of the card with bostik glu

•pour some bostik glu on a plate and get your kids to dip their palms in them, ensuring all fingers are covered to the tips

• place hand on the card to make a glu imprint

• cover with glitter

•shake off excess

•done!

Bostik Christmas craft 

Hi guys!! It’s never too early to start Christmas crafts and with bostik glu products it’s never been easier to get the kids involved!

Today we made a Rudolph bag, a Christmas card and an angel for the top of the tree!

So easy and so much fun!
The Christmas tree angel –


A Christmas tree fairy 

You need- 

Bostik white glu

Bostik glu dots

Bostik fine and wide glu pen

Toilet roll

Polystyrene ball, cut in half

Pink felt

Googly eyes 

Marker pens

Thread 

White pipe cleaner 

Gold pipe cleaner 

Gold twine 

White felt 

White netting 


Glue the pink felt around the 1/2 ball to make a head using bostik white glue


Glue on the eyes and the thread to make hair using bostik glu pen


Draw on the face with the markers 


Glue the white felt, gold twine and netting onto the toilet roll


Stick the white pipe cleaner into the head 


Attach inside the toilet roll using bostik white glu


Let dry then cut the gold pipe cleaner in half and make circles

Secure in place with a bostik glu dot then stick with white glu, allow to dry 


Place on top of your Christmas tree

A reindeer bag

So easy! My 5 year old made this
You will need – 

A paper bag

Eyes 

Marker pen

A red Pom-Pom 

Gold leaves 

Bostik glu dots

Bostik fine and wide glu pen


Stick them on as pictured!! 


Christmas tree card

With a little help with the cutting this is another activity your kids can freestyle 
You will need –

Bostik glu dots

Bostik fine and wide glu pen

Green foam

Hessian

Foam star 

Glittery things to make baubles 


Stick the hessian on to make a trunk with the bostik glu 


Cut the foam into a tree shape and stick that on with the glu too


Let your kids kids the decorations on with the glu dots 


Bostik autumn craft

Super easy autumn craft!
Crafting is fun and you can make learning fun by combining the two 👍🏻

You need –

Black card 

Beige hessian

Green netting 

Material leaves 

Scissors

Bostik glu dots 

Bostik white glu


1) Cut the hessian to a length to imitate the tree trunk and stick with bostik glu to the card

2) Cut a circle of netting to be the tree top and stick with bostik glu dots to the top of the trunk


3) Stick various leaves on the netting with glu dots and talk about the different colours for each season 

Done!! 🍁🍂🍁🍂🍁

Bostik Halloween  crafts 

Sparkly Halloween masks!!

Anyone else’s princesses demand sparkle even when it’s meant to be scary??!!! Bostik’s got you covered!! Make your own sparkly Halloween mask or hop-tu-naa mask as we call it in the Isle of Man 

You will need –

Bostik white glu

Bostik glu dots

Different coloured sparky card

Plain black card

Sun, moon and stars gems, eyes and multicoloured sticks 

Marker pen 

Scissors 

Elastic 

1) cut around a plate on each piece of card

2)cut the glittery card into strips and use bostik glu to stick onto the black card


3) cut out 2 eye holes


4) use the bostik glue dots to stick the eyes down the middle piece


5) stick sun, moon and stars gems on one side with glu dots


6) attach the sticks to the other side with white glu


7) draw on eyelashes with pen


8) make a small hole each side and attach the elastic 

Tada!!! Done 💁🏼💁🏼

Monster spider from Trolls!! 

Anyone else’s kids OBSESSED with the film Trolls? It feels like it’s on in our house every day haha! They have lots of little troll toys so I thought I’d make them a monster spider with the arts and crafts I was sent featuring bostik glue (which has a thick and thin spout, one at each end which is AMAZING for craft work!!) 


You will need- 

Pink felt

Purple felt

Polystyrene egg

Bostik glue

Foam hand

Blue pompom

3 green feathers 

2 green pipe cleaners

4 eyes (2 different sizes) 

Scissors 

Place the egg on the pink felt and cut off enough for it to be totally covered. Cover the egg with bostik glue using the wide end, place top down on the felt and wrap around the egg. Cut off any over hang of folds, but ensure that the whole egg is covered (you can stick on any cut offs if you need to)


Cut the purple felt into 3 strips, cover with bostik glue and wrap around the egg, sticking down well

Take your blue pompom and foam hand. Cut the hand and pompom in half.

Glue the pompom 1/2 to the egg 1/2 way down to make the mouth. Glue the fingers from the hand to the pompom to make the teeth

Using the thin tip of the bostick glue, stick on the eyes, bigger pair in the middle and smaller pair one each side

Take the pipe cleaners and fold in half, cut to make 4 equal lengths then fold in half again, cut to make 8 equal lengths 

Peel away some of the felt from the bottom and stick in 3 pipe cleaners each side to make 6 legs. Fold the felt carefully back over 

Make a hole in either side of the egg half way up, either with a pencil or carefully with the scissors. Place the last 2 pipe cleaners in these holes to make 2 arms 

On the back put a big blob of bostick glue and stick on the feathers to make the hair


Now you have the scary spider monster from the trolls movie!!

Ta da!!